- Getting Started
- Sign Up
- Workflow Overview
- Glossary
- Connect with WordPress
- Connect Web Apps
- Workflows
- Triggers
- Actions
- Edit Workflows
- Types of Trigger Data
- Data Mapping
- Test Action
- Workflow History
- Auto-replay Failed Steps
- Update/Delete Connections
- Webhook URL Update
- Ensuring a Seamless WordPress Connection with OttoKit
- How to Disconnect OttoKit from WordPress
- How to Delete a WordPress Connection in OttoKit
- How to Generate a Random Number in OttoKit
- Automatically Add WooCommerce Orders to Google Sheets
- AI Agents
- Replay Failed Steps
- API App
- Schedule App
- Filter Versus Condition
- Filter App
- Delay App
- Branch App
- Email Parser
- Export/Import Workflows
- Hide OttoKit from WordPress
- Using Conditions
- Number Formatter
- Date/Time Formatter
- Trigger Button
- Path App
- Folders
- Organizations and Workspaces
- Human in the Loop
- Getting Started with Otto AI Agents: A Step-by-Step Workflow Example
- Automate Repetition with Precision: OttoKit Loop Integration
- How to Switch Organizations in OttoKit
- How to Invite Members to a Workspace in OttoKit
- How to Disconnect OttoKit from WordPress
- How to Delete a WordPress Connection in OttoKit
- Code by OttoKit (Python) – Complete User Guide
- Using the XML App in OttoKit
- Using the FTP App in OttoKit
- Using the HTML App in OttoKit
- OttoKit Text Formatter
- How to Generate a Random Number in OttoKit
- Using the Convert to File App in OttoKit
- Create ClickUp Tasks from Slack Messages
- Automatically Respond to Form Submissions
- Workflow Tools
- Automatically Add WooCommerce Orders to Google Sheets
- Add SureCart Orders to Google Sheets
- Send Elementor Pro Form Submissions to Google Sheets
- Send Gmail Notifications When WordPress Posts Are Created
- Send WooCommerce Order Confirmations to Gmail Automatically
- Send SureCart Order Data to Brevo
- Prerequisites
- Building an Integration
- Setting Up Authentication
- Setting Up Triggers & Actions
- Publishing Integration
- How To Authenticate Your Application Using The API Key Method
- How to Set-Up the Integration Based on Auth Type Bearer Token
- How To Authenticate Your Application Using OAuth 2.0
- How To Authenticate Your Application Using Basic Auth
- How To Authenticate Your Application Using The JWT Bearer Method
How to Generate a Random Number in OttoKit
Sometimes your workflow needs a little unpredictability, maybe you’re assigning tasks evenly, generating unique filenames, or simulating test data. Whatever the case, OttoKit makes it easy to generate a random number using the Formatter → Number event. No code, no scripts, just a quick action drop-in.
This guide walks you through why random numbers come in handy, how to use them in your workflow, and what each configuration option actually means.
Why Random Numbers Matter
Random numbers might sound simple, but they play an important role in keeping workflows flexible and adaptable. They help you create an ID for users, generating temporary codes or tokens, preventing API rate limits
Real-World Use Cases
Here are a few situations where generating a random number is surprisingly useful:
Creating Unique References
Maybe you’re generating files or log entries and don’t want anything to overwrite. A random number baked into the filename can instantly solve that.
Testing and Simulations
When building or troubleshooting a workflow, it’s helpful to feed in values that aren’t predictable. Random numbers let you mimic real-world behavior during testing.
One-Time Codes or Temp Values
Need a quick verification code for a demo or internal process? A random number does the job instantly.
Random Wait Times
If you’re trying to avoid hitting an API too frequently, you can generate a random delay, super useful when spacing out calls.
Randomized Content
Ever want your notifications or messages to feel less repetitive? Use a random number to pick from a list of templates or snippets.
How to Generate a Random Number in OttoKit
Setting this up is very straightforward. Here’s all you need to do:
- Add a new action to your workflow.
- Search for Formatter and choose the Number event.
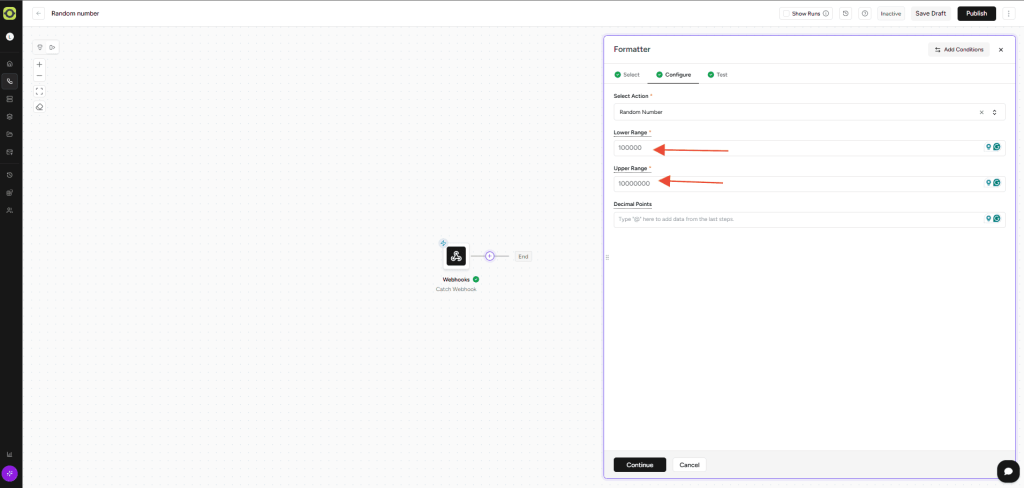
- Click Continue to open the configuration panel.
- Select the Random Number action.
- Fill in the fields (we’ll explain them in a moment).
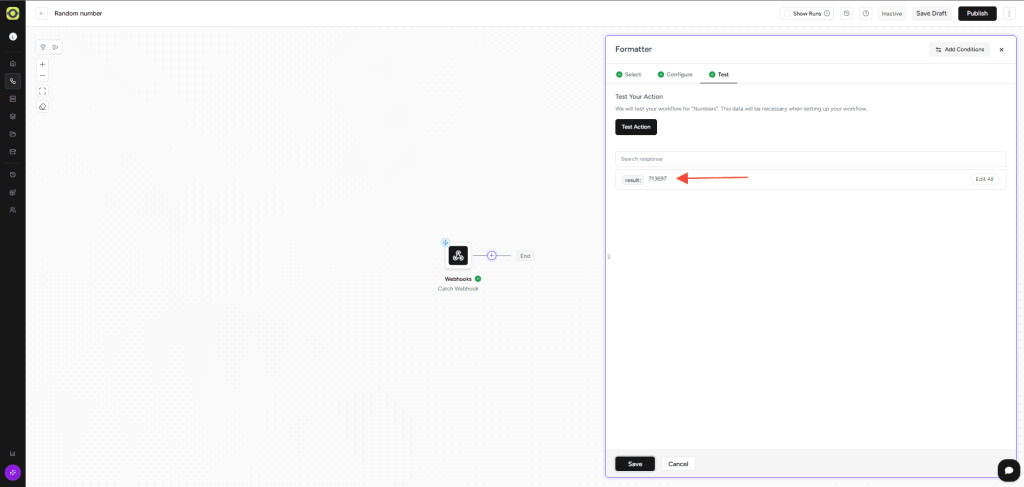
- Click Continue again to move to the Test Step.
- Hit Test to see the random number OttoKit generates.
- If everything looks good, click Save.
- You now map the random number generated into other actions or steps.
That’s it. Your workflow now generates a fresh random number every time it runs.
What does Each Field mean?
Here’s a quick breakdown of the options you saw:
Lower Range
This is the lowest number OttoKit is allowed to produce. It can be positive, zero, or even negative, whatever fits your use case.
Upper Range
This is the highest number OttoKit can generate. Just like the lower range, negative values are perfectly fine.
Decimal Points
If you want a whole number, set this to 0. If you want something like 4.27 or 9.005, choose how many decimal places you want, anywhere from 0 to 15.
Example:
- 0 → 7
- 3 → 4.656
It’s simply a way to control the level of precision.
Random numbers may feel small, but they unlock a ton of flexibility in OttoKit, unique values, fair distribution, smarter testing, and more dynamic flows.
We don't respond to the article feedback, we use it to improve our support content.