- AI Agents
- Replay Failed Steps
- API App
- Schedule App
- Filter Versus Condition
- Filter App
- Delay App
- Branch App
- Email Parser
- Export/Import Workflows
- Hide OttoKit from WordPress
- Using Conditions
- Number Formatter
- Date/Time Formatter
- Trigger Button
- Path App
- Folders
- Organizations and Workspaces
- Human in the Loop
- Getting Started with Otto AI Agents: A Step-by-Step Workflow Example
- Automate Repetition with Precision: OttoKit Loop Integration
- How to Switch Organizations in OttoKit
- How to Invite Members to a Workspace in OttoKit
- How to Disconnect OttoKit from WordPress
- How to Delete a WordPress Connection in OttoKit
- Code by OttoKit (Python) – Complete User Guide
- Using the XML App in OttoKit
- Using the FTP App in OttoKit
- Using the HTML App in OttoKit
- OttoKit Text Formatter
- How to Generate a Random Number in OttoKit
- Using the Convert to File App in OttoKit
- Create ClickUp Tasks from Slack Messages
- Automatically Respond to Form Submissions
- Workflow Tools
- Automatically Add WooCommerce Orders to Google Sheets
- Add SureCart Orders to Google Sheets
- Send Elementor Pro Form Submissions to Google Sheets
- Send Gmail Notifications When WordPress Posts Are Created
- Send WooCommerce Order Confirmations to Gmail Automatically
- Send SureCart Order Data to Brevo
- Prerequisites
- Building an Integration
- Setting Up Authentication
- Setting Up Triggers & Actions
- Publishing Integration
- How To Authenticate Your Application Using The API Key Method
- How to Set-Up the Integration Based on Auth Type Bearer Token
- How To Authenticate Your Application Using OAuth 2.0
- How To Authenticate Your Application Using Basic Auth
- How To Authenticate Your Application Using The JWT Bearer Method
Using the Convert to File App in OttoKit
Need to turn workflow data into downloadable files on the fly, HTML, CSV, ICS calendars, spreadsheets, PDFs, or even Base64? The Convert to File App lets you generate clean, ready-to-use files directly inside your automations. No external converters, no manual formatting, and no temporary scripts required.
You can pass raw data, mapped fields, or structured content depending on the file type you’re generating. The app outputs a public file URL you can use anywhere in your workflow.
Note: This integration creates files only. It does not interpret or execute code inside the file (HTML, JS, etc.).
Table of Contents
Actions in the Convert to File App
1) Convert to HTML
This action allows you to turn raw HTML content into a downloadable .html file.
To convert to HTML:
- Add a new action to your workflow.
- Search for Convert to File and select it.
- Choose Convert to HTML.
- Click Continue to open the Configure tab.
- Fill in the fields:
Data (required) – Specify or map the HTML data.
This should include your full HTML boilerplate, such as:
<!DOCTYPE html>
<html>
<head><meta charset=”UTF-8″><title>Sample</title></head>
<body><h1>Hello World</h1></body>
</html>
Click Show Optional Fields for additional configuration:
Filename – Specify the filename, e.g., index.html or index.
Inline CSS – Choose whether to inline CSS automatically (True or False).
Header Rows – Select whether to include header rows when converting table data (True or False).
- Click Continue to open the Test Step tab.
- Click Test to generate your HTML file.
- If everything looks good, click Save.

2) Convert to CSV
Turns structured CSV text into a .csv file ready for download or further processing.
To convert to CSV:
- Add a new action.
- Search for Convert to File.
- Select Convert to CSV.
- Click Continue.
- Fill in the fields:
Data (required) – Specify or map the CSV data (raw text).
Click Show Optional Fields for additional configuration:
Filename – The file’s name, e.g., index.csv or index.
Delimiter – Specify the CSV delimiter, e.g., , or ;.
Header Rows – Add header rows or not (True or False).
- Click Test, then Save.

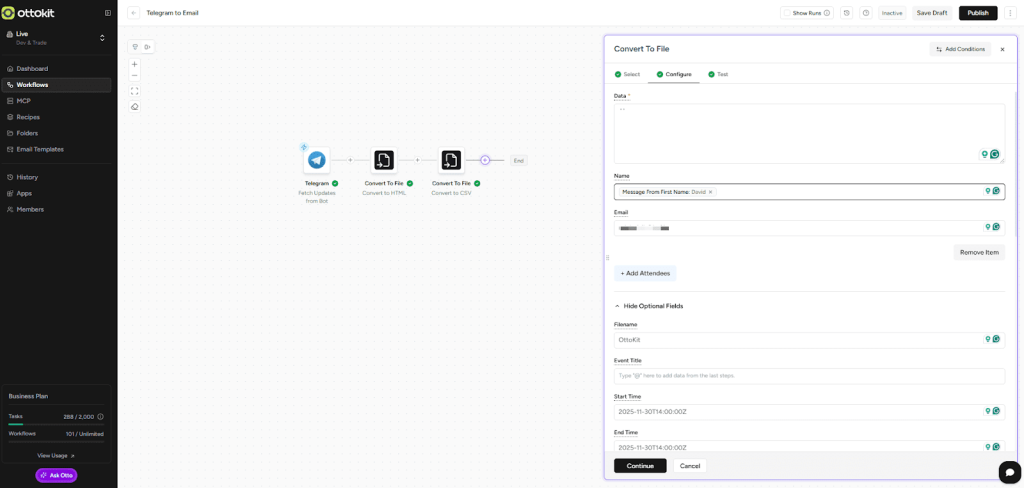
3) Convert to ICS
Create calendar events in .ics format from workflow data.
To convert to ICS:
- Add a new action.
- Search for Convert to File and choose Convert to ICS.
- Click Continue.
- Fill in the fields:
Data – Provide ICS markup or add a space ” ” when using the form fields below.
Click “Add attendees” to include one or more attendees.
Then specify:
- Filename – e.g., event.ics or index.
- Event Title – Name of the event.
- Start Time – YYYY-MM-DDTHH:MM:SSZ.
- End Time – Same format as above.
- All Day – True/False.
- Location – Event location.
- Description – Event details.
- Organizer Email Address
- Organizer Name
- Calendar Name
- Timezone – e.g., “America/New_York”.
- Status – Confirmed, cancelled, or tentative.
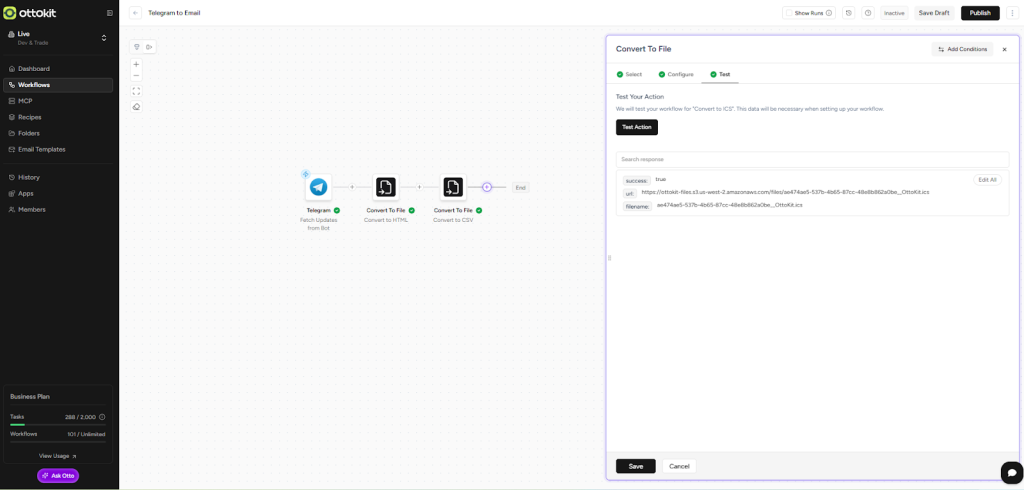
- Test and save.
A link to the ICS is then generated:
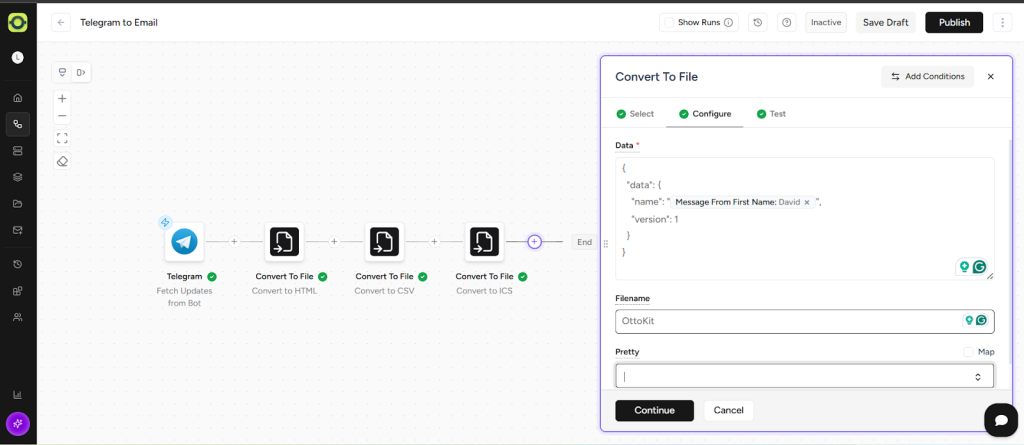
4) Convert to JSON
This action allows you to generate a .json file from your mapped data.
To convert to JSON:
- Add a new action and select Convert to JSON.
- Configure the fields:
Data (required) – Wrap your data in a top-level key:
{
“data”: {
“name”: “OttoKit”,
“version”: 1
}
}
Filename – e.g., index.json.
Pretty – Enable pretty formatting (True/False).
- Test and save.
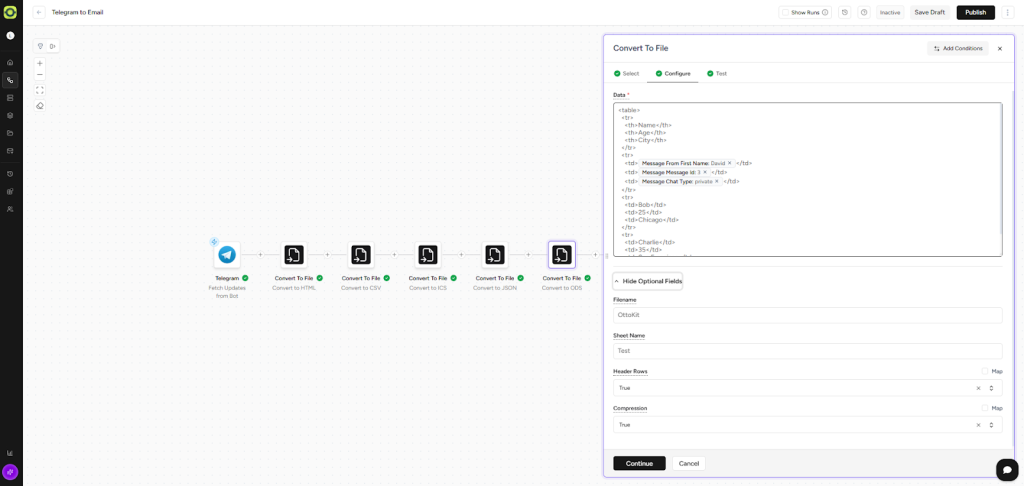
5) Convert to ODS
Convert mapped data into an OpenDocument Spreadsheet (.ods).
To convert to ODS:
- Add a new action and choose Convert to ODS.
- Configure the fields:
Data (required) – Specify the ODS-compatible data.
Show Optional Fields:
- Filename – e.g., index.ods.
- Sheet Name – Name of the spreadsheet tab.
- Header Rows – Include header rows or not.
- Compression – Compress file output (True/False).
- Test and save.
A link to the ICS is then generated:

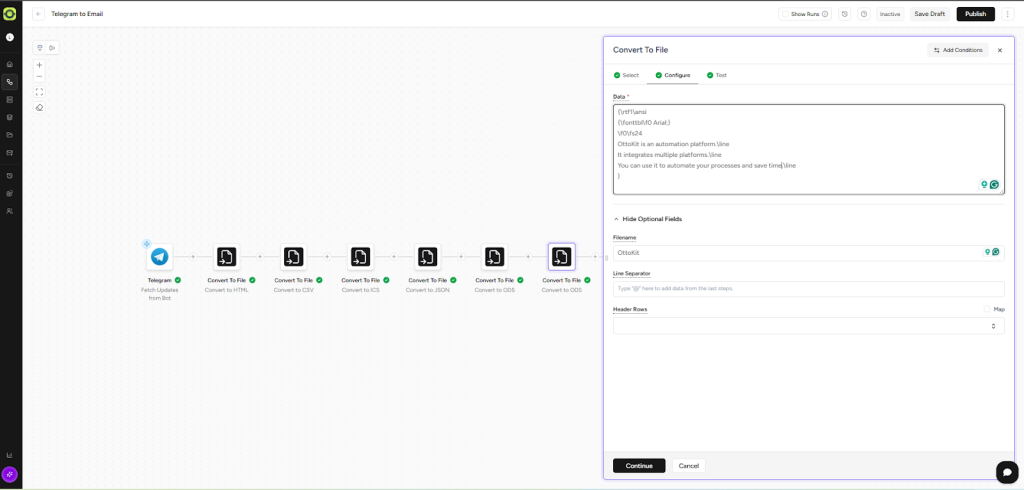
6) Convert to RTF
Generate a Rich Text Format file from raw RTF markup.
To convert to RTF:
- Add the action and select Convert to RTF.
- Configure:
Data (required) – Specify or map the RTF content.
Show Optional Fields:
- Filename – e.g., index.rtf.
- Line Separator – e.g., \n.
- Header Rows – Include header rows (True/False).
- Test and save.
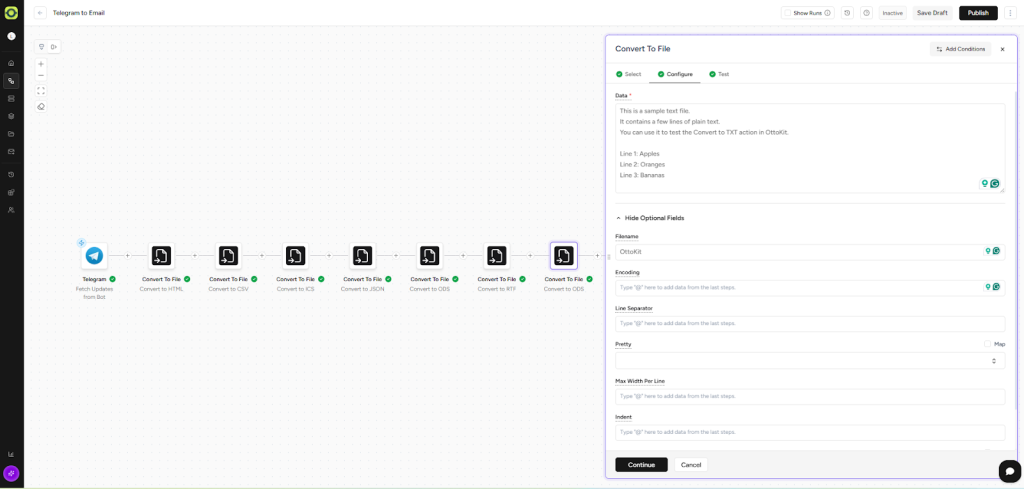
7) Convert to TXT
This action allows you to create a plain text file with flexible formatting options.
To convert to TXT:
- Add the action and choose Convert to TXT.
- Configure:
Data (required) – Specify or map the text content.
Show Optional Fields:
- Filename – e.g., index.txt.
- Encoding – e.g., “utf-8”.
- Line Separator – e.g., \n.
- Pretty – Enable pretty formatting (True/False).
- Max Width Per Line – Outline the maximum characters per line.
- Indent – Indent string for formatting.
- Trim – Trim whitespace (True/False).
- Test and save.
8) Convert to XLSX
Convert workflow data into an Excel .xlsx file.
To convert to XLSX:
- Add a new action and select Convert to XLSX.
- Configure:
Data (required) – Map XLSX-compatible data.
Show Optional Fields:
- Filename – e.g., index.xlsx.
- Sheet Name – Tab name.
- Header Rows – Include headers (True/False).
- Compression – Compress output (True/False).
- Test and save.
9) Convert to PDF
Turn mapped content into a downloadable PDF file.
To convert to PDF:
- Add the action and choose Convert to PDF.
- Configure:
Data (required) – Specify or map the PDF data.
Show Optional Fields:
- Filename – e.g., index.pdf.
- Page Size – e.g., A4.
- Font Size – e.g., 18.
- Margin – Page margins.
- Layout – Landscape or Portrait.
- Header Row – Include header rows or not.
- Test and save.

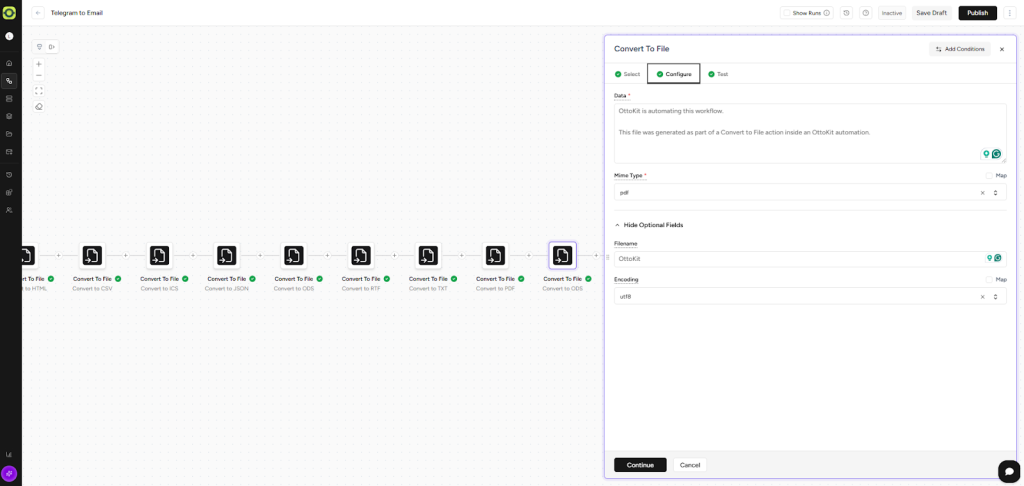
10) Move Base64 String to File
Convert Base64-encoded data into a downloadable file.
To move Base64 to a File:
- Add the action and select Move Base64 String to File.
- Under the configure tab:
Data (required) – Map the Base64 string.
Mime Type – Choose the target MIME type (pdf, jpeg, html, csv, etc).
Optional Fields:
- Filename – File name.
- Encoding – utf8, ascii, or binary.
- Test and save.
11) Convert to Base64
Convert a file URL into a standard Base64 format.
To convert:
- Add the action and choose Convert to Base64.
- Configure:
URL (required) – Map the file URL.
Filename – Optional output filename.
- Test and save.
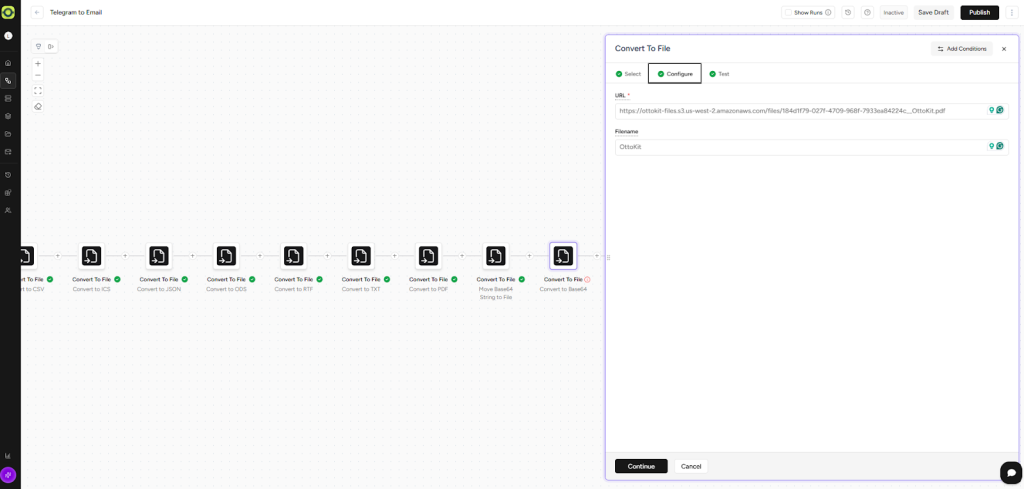
Here is the Base64 file:

12) Convert to Raw Base64
Generate raw Base64 output without formatting.
To convert:
- Add the action and choose Convert to Raw Base64.
- Configure:
URL (required) – Map the file URL.
- Test and save.
13) Fetch File via Pre-Signed URL
Download a file from a pre-signed URL and return a public URL for the uploaded file.
To fetch:
- Add the action and select Fetch File via Pre-Signed URL.
- Configure:
URL (required) – Enter the pre-signed URL.
Filename – Provide the output filename.
- Test and save.
With the Convert to File App in OttoKit, you can turn structured data into real files, spreadsheets, documents, calendars, text files, or even Base64 in seconds. No outside tools, no formatting headaches, and no manual conversions.
Whether you’re building automated reports, generating files for clients, packaging data for downstream systems, or converting workflow output into downloadable documents, OttoKit makes it fast, flexible, and reliable.
Start using the Convert to File App today and add powerful file-generation capabilities to every workflow you build.
We don't respond to the article feedback, we use it to improve our support content.